
The first essential fly tying tool is a vise, which holds the hook securely so that you can use both hands to manipulate thread and materials. When buying a vise for fly tying, there are a number of factors to consider: size, type of jaw system, clamp vs. pedestal bottom, and whether or not you want a vise with rotary jaws.
Table of Contents
Vise Size
Vises vary in the size hooks they can hold. Some vises can hold everything from a size 28 midge to a size 4/0 tarpon hook. Others specialize in either large or small hooks. Some higher-end vises have removable jaws for different size ranges of hooks.
Most advertising literature will tell you what size range a particular vise holds. If it doesn’t, assume that the vise holds at least size 4–20 hooks (the range of most trout flies).
Vise Jaw Systems
Fly tying vise jaw systems come in three main varieties:
- Cam-operated: Most vises use a cam-operated system, in which a lever jams the jaws together around the hook. These types of vises have adjustments that let you change the size of the opening between the jaws and the pressure applied when the cam is engaged. You should adjust the jaws so that when the cam is fully engaged, the hook is held so firmly that it will bend before it will move in the jaws. If the hook slides up and down in the jaws, open the cam, tighten the jaws slightly, and try again. If you’ve tightened the jaws so much that you have to force the cam, open the space between the jaws slightly. Forcing the jaws, especially over a big saltwater hook, can snap them.
- Screw-tightened: On this type of vise, also called a spring-tension vise, you simply tighten a big knob on the end of the jaws until the hook is held securely. The disadvantage of this type of vise is that you have to screw and unscrew the jaws every time you change hooks, even if the hooks are all the same size.
- Spring clamps: This vise, also called a screw-adjustment vise, uses an ingenious spring clamp that never needs any adjustment. You pull a lever to open the jaws against the spring tension just enough to place the hook between the jaws. When you release the lever, the jaws spring closed around the hook. This vise is fast when tying lots of flies in different sizes and is popular with commercial tiers.
Clamp or Pedestal Vises
A vise must be secured to a table or other firm surface. Most vises are made to attach to a table with either a C-clamp or a movable but heavy pedestal. Many vise designs can be attached either way, and you can usually buy the vise with one type of attachment and purchase the other later.
- C-clamps are very sturdy and are great if you tie quickly or if you’re tying big saltwater flies or deer hair, where a lot of pressure is put on the fly. However, if not used carefully, a C-clamp can mar the surface of a nice table, and it’s sometimes difficult to find a table with the right-sized edge for the clamp. If you tie flies on the go, note that motel nightstands are notorious for not having a wide enough lip for a fly tying vise.
- Pedestals allow you to move your vise from one table to another in seconds. You can tie on any surface—a picnic bench, a table in your den, or the kitchen table—regardless of whether it has a lip. The main disadvantages of pedestal bases are that they’re heavy to travel with, and that you’re stuck with one jaw height above the table, since the stem of the vise does not raise and lower as it does with a C-clamp vise.
Rotary or Not?
Vises can be made with stationary or rotary jaws. Stationary vises have no advantage other than cost, because a rotary vise can be made stationary by simply tightening the rotating feature down until it no longer moves. With a stationary vise, if you want to look at the bottom or far side of the fly, you must either remove the fly from the jaws and remount it upside down, loosen the stem and flip the vise from right-handed to left-handed, or crane your neck around the far side of the vise.
With a rotary vise, you can rotate the jaws 360° without removing the hook from them. A set screw, controlled by a knob or Allen wrench, tightens or loosens the rotation of the jaws. By experimenting with this adjustment, you can come up with an amount of tension that keeps the vise stationary throughout most tying operations yet allows you to rotate the jaws and look at the far side or bottom of the fly (or to actually place materials at these hard-to-reach points).
Rotary Tying
Certain operations in fly tying lend themselves to true rotary tying. In rotary tying, the bobbin is placed out of the way, in a thread cradle. You grab the material you want to wind and then rotate the jaws while feeding the material to the proper place on the hook. This approach not only is faster but also lets you see where the material is going at every angle.
For example, say you’re tying a fly in which the entire hook shank needs to be covered with two layers of tinsel. In traditional winding, you’d bind one end of the tinsel in place, then wrap it around the hook by reaching over to the far side of the hook with one hand, picking it up with the other hand, and then catching it again with the first hand. You can’t just wrap the material around the hook with one hand because the bobbin gets in the way. Nor can you see how the material is laying down on the far side of the hook or underneath it.
With rotary tying, the bobbin is placed out of the way in a bobbin cradle, and you hold the tinsel in one hand while your other hand rotates the vise jaws. You can see exactly where each turn of tinsel is placed, eliminating any sloppy gaps or overlaps. When winding hackle, you also get smooth, even wraps.
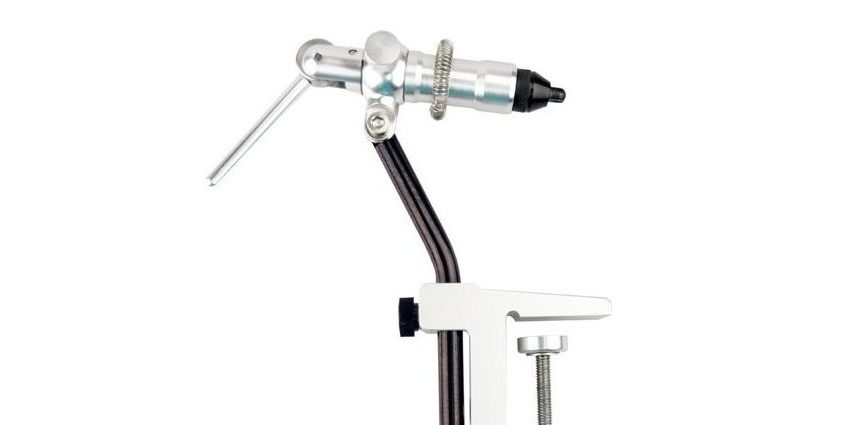
Different Vise Setups
The following images show a number of different types of vises, each with a different assortment of features.
Vise Recommendations
If you’re buying your first fly tying vise, your best bet is to get a C-clamp, stationary vise. These vises are durable, easy to use, and inexpensive: you can get a decent one for less than $50 and a great one for around $100. If you want to upgrade to a better vise later, consider a pedestal, rotary vise. You can expect to pay a minimum of $150 and as much as $400 for a beautifully machined tool with lots of adjustments, material clips, parachute tools, and other bells and whistles.

Comments are closed, but trackbacks and pingbacks are open.